

Widefield fluorescence microscopy: What you need to know
Widefield fluorescence microscopy is an imaging technique where the whole sample is illuminated with light of a specific wavelength, exciting fluorescent molecules within it. Emitted light is visualised through eye pieces or captured by a camera.
This technique enables the identification and visualisation of cells, cell components and defined proteins. Widefield microscopes are excellent for producing 2D images of specimens as the entire field can be captured at once. The amount and localisation of specific fluorescent molecules can be seen with fast temporal resolution. Processes in live cells, such as neuronal signalling, can be measured in real time.
Fluorophores
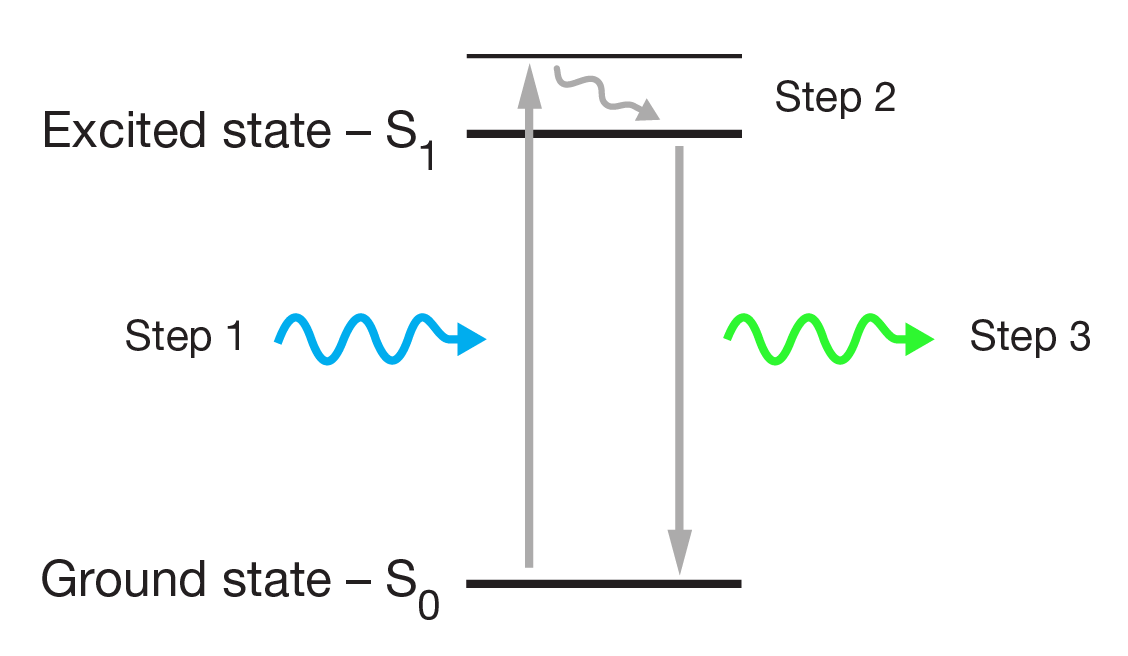
Fluorophores are molecules which can be excited by light of a specific wavelength (the excitation wavelength), causing them to emit light of a longer wavelength (the emission wavelength).
The light is absorbed by the fluorophore, exciting the electrons from their ‘ground state’ (lowest energy level) to an ‘excited state’ (higher energy level). When the electrons return to their ground state, they emit light of a longer wavelength, which is seen as fluorescence.
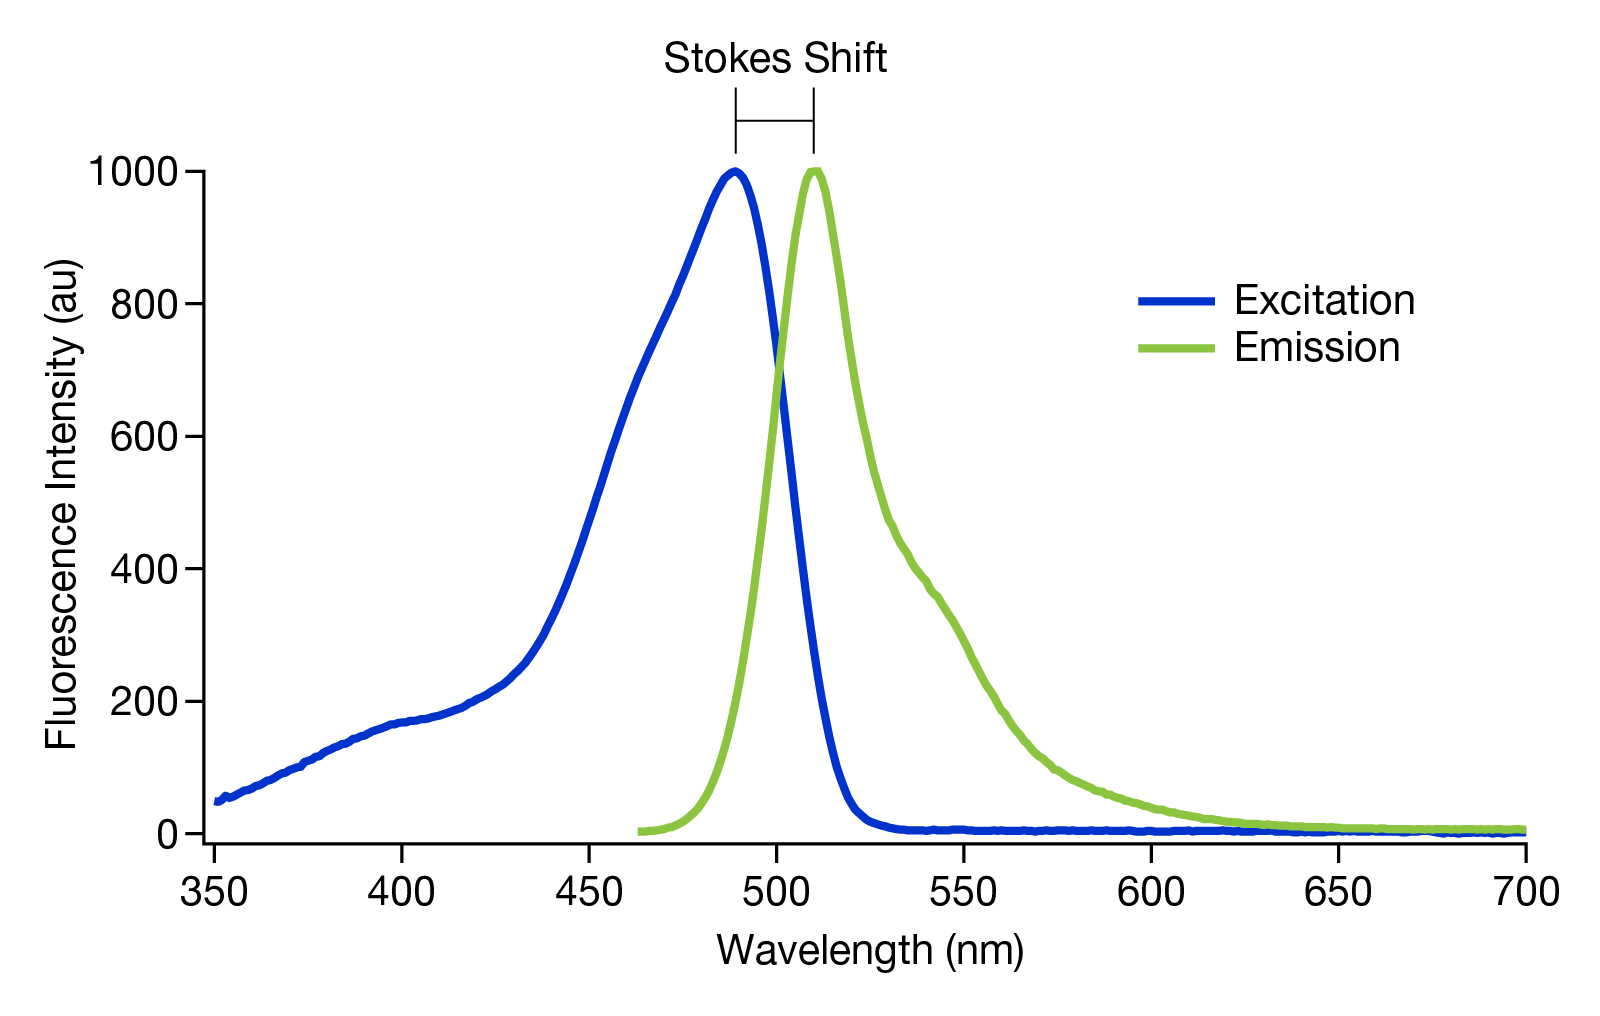
The difference between the excitation and emission wavelengths of a fluorophore is called the ‘Stokes shift’ (see figure 2). The range of wavelengths, and thus colours of light, that a fluorophore can absorb and emit are known as excitation and emission spectra. All fluorophores have peak wavelengths of excitation and emission. This difference in the excitation and emission spectra of individual fluorophores means they can be used to differentiate separate targets in the same sample.
Fluorophores can be used to label specific parts of biological samples. They can be naturally occurring in organisms, such as chlorophyll. They can also be introduced into organisms through genetically engineering their DNA to encode fluorescent molecules. Alternatively, antibodies can be tagged with small molecule fluorophores, such as Texas Red, and then introduced into the specimen.
Fluorophores emitting colours across the visible light spectrum have been developed. Commonly used fluorophores include Green Fluorescent Protein (green emission), 4',6-diamidino-2-phenylindole – DAPI (blue emission) and Texas Red (red emission).
How fluorescent microscopes work
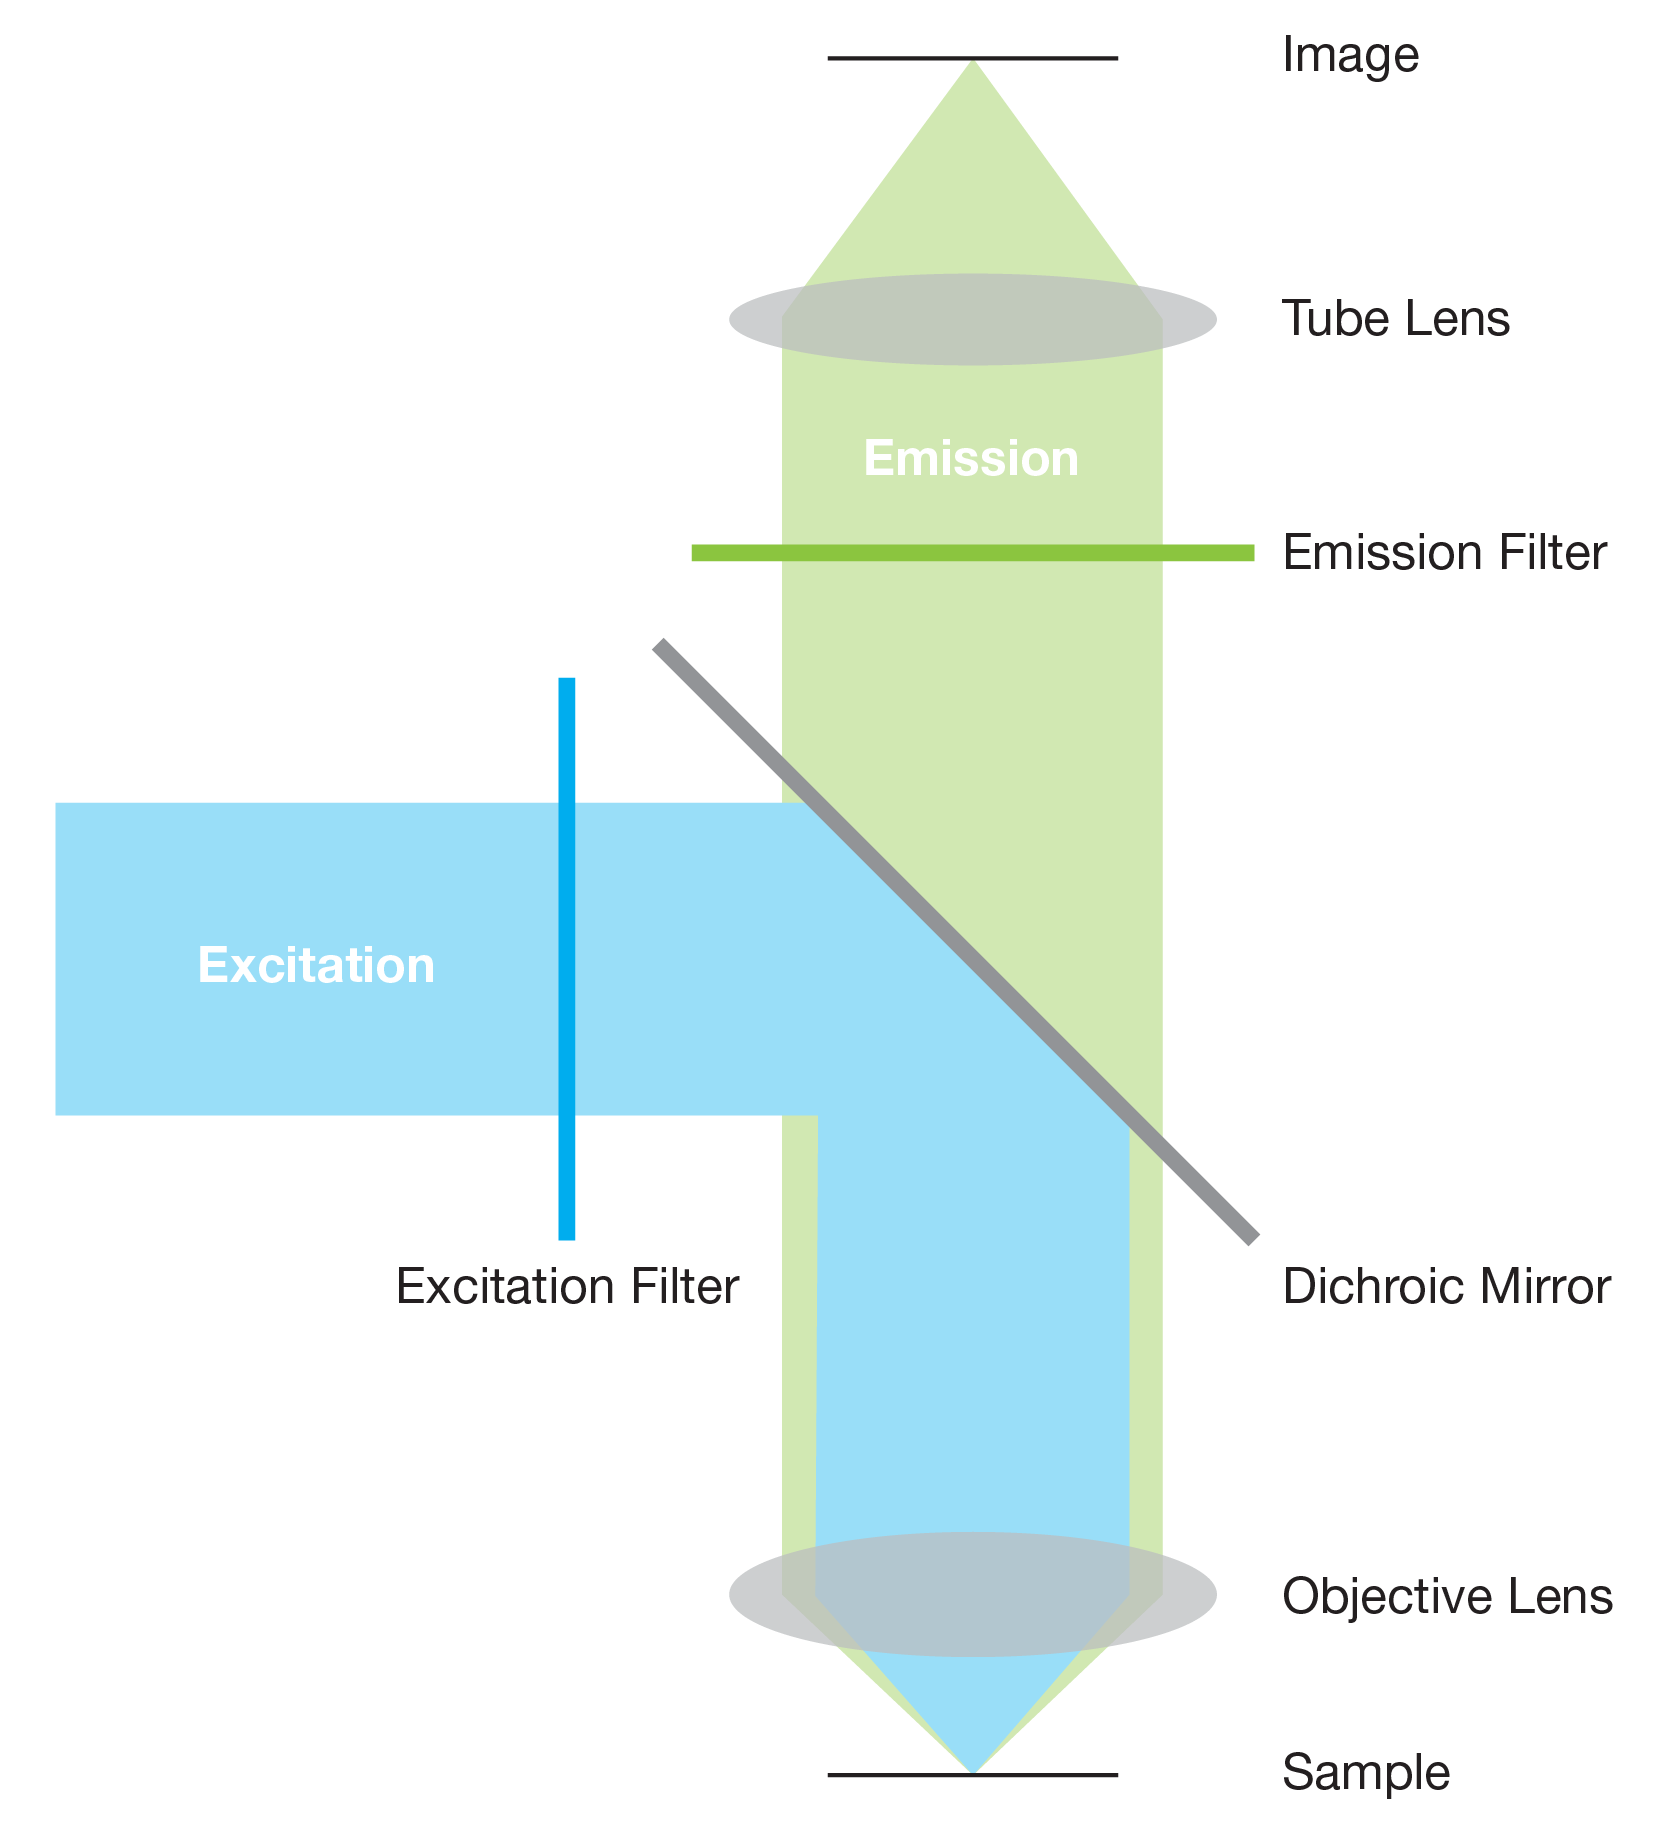
Excitation light is emitted from a light source and passes through an excitation filter which only allows light of specific wavelengths that excite the fluorophore to pass through. This excitation light is reflected off a dichroic mirror, focused through the objective lens and onto the sample
When the excitation light hits the sample, fluorescent molecules within the sample are temporarily excited to a higher energy state. When they relax back down to their ground-state, light of a longer wavelength is emitted.
Some of the emitted light is collected by the objective lens, transmitted by the dichroic mirror then passed through an emission filter. The emission filter blocks excitation light and transmits emission light to the eyepiece/camera to be viewed or imaged.
This technique, where both the excitation and emitted light pass through the same objective lens, is known as epifluorescence.
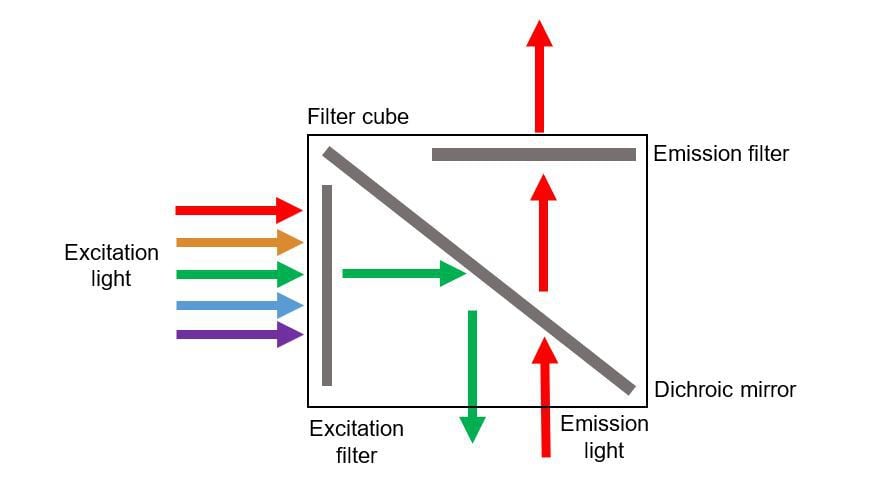
The excitation filters and dichroic mirror are usually located in a filter cube. By only allowing light of specific wavelengths to pass, the filter cube reduces the ‘noise’ from the sample, ensuring a clear image is produced which only shows the fluorescence of specific fluorophores.
The light source
The most common light sources used today are light-emitting diodes (LEDs). The wavelengths and intensities of light they produce can be precisely selected and controlled, they are inexpensive, do not produce excess heat, do not require alignment and are very compact. These properties make them a superior light source to use in comparison to arc-lamps and tungsten-halogen lamps which were commonly used in the past.
Mercury or xenon arc-lamps have powerful intensities at set wavelengths, however they produce a lot of excess heat, have a high intensity (so photobleaching and phototoxicity are more likely) and have to be disposed of as hazardous waste due to the nature of the elements they contain. They also have a much shorter lifetime than LEDs.
Tungsten-halogen lamps have a reduced phototoxicity, are less expensive and provide a more even illumination compared to arc-lamps. However, their intensity is lower and can be too low to image weak fluorophores.
Read more about light sources
The camera
Samples can be observed using an eyepiece, however, a camera is needed for image acquisition. The cameras contain millions of photodiodes, which each have semi-conductor sensors that convert light into electrical current. The most common semi-conductor sensors are CCD (Charge Coupled Devices) and CMOS (Complementary Metal Oxide Semiconductors). The camera used depends on the required frame-rate, noise level and sensitivity.
sCMOS (scientific CMOS) cameras are also used, these offer low noise, rapid frame rates, wide dynamic range, high resolution and a large field of view simultaneously. sCMOS cameras are suitable for high fidelity, quantitative research and low-level light environments.
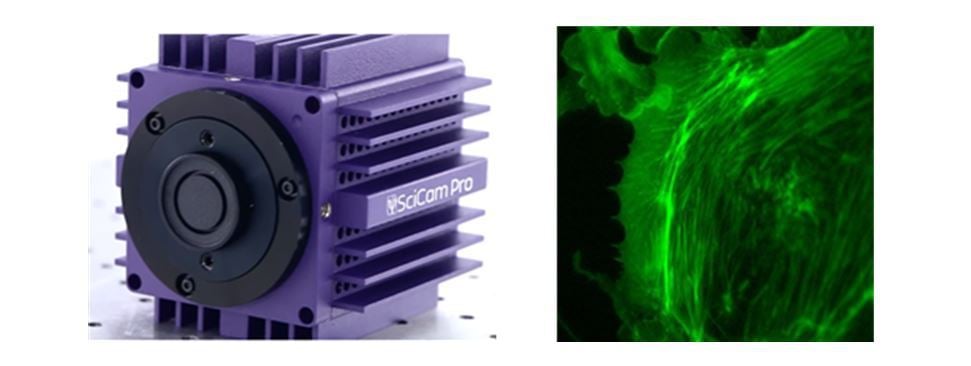
Electron Multiplied CCD cameras enable fast detection of low-light fluorescence. Cooled CCD cameras allow fluorescence signal to be gradually accumulated with little noise while maintaining high resolution. Both developments allow for faster imaging with better contrast at low signal levels.
Read our comparative guide of cameras used in fluorescence imaging
Resolution
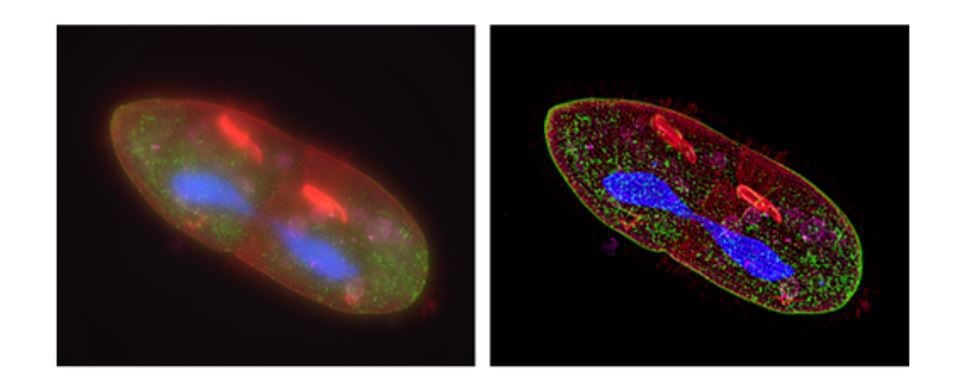
Widefield microscopy can produce high-resolution images. However, because the whole sample is illuminated, there are factors that can reduce the resolution. It can be difficult to tell how deep in the sample the fluorescence originated from, especially in thick samples such as live cells or tissues, as the emission light is incorporated throughout the sample. The emitted fluorescence can scatter, making the image appear blurry. This makes widefield microscopy sometimes unsuitable for producing 3D images.
Fluorescence deconvolution microscopy and structured illumination microscopy can be solutions to these problems. Figure 6 shows the effects of deconvolution, a computational technique that improves the resolution of widefield microscopy images by removing out-of-focus light and re-assigning blurred light to source points.
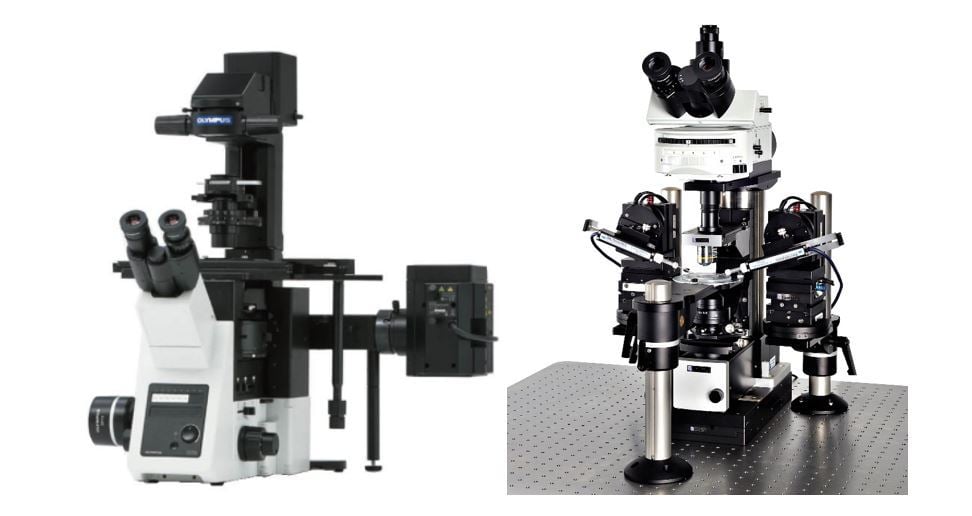
Microscope configuration
The sample can be illuminated from above, using an upright microscope, or from below, using a microscope in an inverted configuration.
Inverted microscopes are best for viewing living cells in culture, whereas upright microscopes are more suitable for viewing fixed samples such as tissue slices.
Find out about Scientifica's latest product releases, company news, and developments through a range of news articles, customer interviews and product demonstration videos.