

#LabHacks: Tips for cleaning the optics of your microscope
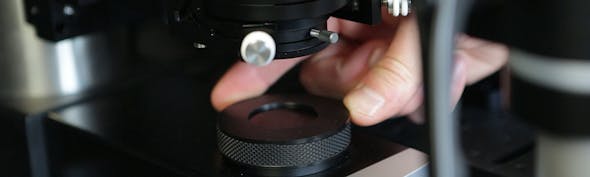
Keeping the optical system of your microscope clean at all times is essential for high quality imaging. It is really frustrating if dirt or dust particles are visible when imaging your specimen. If dust spots are left on optical glasses such as lenses, condensers and filters, they can become hard and may attract moisture, further compounding the problem. Demonstrating the importance of cleaning the optics of your microscope.
To ensure your microscope stands the test of time, cleaning the lenses should be made a regular part of the maintenance routine. Alongside Olympus UK’s Life Science team, we’ve compiled some hints and tips which explain the procedure for cleaning the optical lenses of your microscope.
Locate the dirt within the optics of your microscope
Our first tip for cleaning the optics of your microscope is locating where the dirt is. It is important to see where dirt is located so that the affected optical components can be cleaned accordingly.
If you see a spot of dirt on your image when viewing at all objective powers, the dirt is likely to be on the eyepiece lens. However, if you only see dirt at one power, it is likely to be on the objective lens. To check this, turn the eyepiece lens if you can. If the spot moves, this confirms dirt is on the eyepiece lens.
If using a camera, rotate this a small amount. Unlike the other optical surfaces, if dirt is located on the camera surface or its protective cover, it will not move when the camera does. If dust or dirt is on the camera, do not clean this. This should always be cleaned by the camera manufacturer.
Move the specimen whilst it is under the microscope and focus firstly on the upper surface, then on the lower. This will allow you to see any dust or dirt particles on the slide or cover slip.
Check the condenser by moving it up and down and, if possible, by rotating the front lens. If the dirt moves as the condenser does, then this is the optical surface that is affected.
What utensils should you use when cleaning the optics of your microscope?
The optics of your microscope can be cleaned using lens tissue or a cotton swab; both are recommended by various manufacturers. Scientifica does not endorse either – which one you choose to use is down to personal preference. There is often a lower risk of damaging optics when using lens paper, as with a cotton swab, the stick could scratch optical coatings on the lenses.
Cleaning objective lenses
This part of the article refers to how to clean the objective lenses of your microscope. Clean the lens in a spiral pattern, starting from the rim of the lens and moving to the centre, then starting from the centre of the lens and moving out to the rim. Repeat this spiral motion several times. Do not use a zigzag motion, as this will only spread the dirt.

Steps for cleaning objective lenses
1. Place the objective lens on a dust-free surface.
2. Gently blow away loose dust that is on the surface of the optical glass with a dust blower, as if any dust left on throughout the cleaning process could scratch the optical glass or coating. Blow the air across the lens surface to avoid damaging it.
3. Next, use a low-lint lens tissue produced especially for cleaning optics, or a cotton swab.
4. Dip a lens wipe or cotton swab into distilled water and shake off any excess liquid. Then, wipe the lens using the spiral motion. This should remove all water-soluble dirt.
5. Breathe on the lens to generate a layer of moisture, being careful not to release any droplets of saliva, before removing any remaining residue with a dry cotton swab.
6. Remove oily dirt using either a lens cleaning fluid or absolute ethanol on a cotton swab or lens tissue. Stubborn contamination may require several passes, or a stronger solvent such as methanol or acetone.
7. Discard the cotton swab or lens tissue after every use.

Cleaning dipping or oil immersion lenses
Unlike other optical components, which should only be cleaned when dirty, dipping and immersion lenses need to be cleaned after every use, to prevent build-up of salt and oil.
How to clean dipping lenses
To clean the dipping lenses of your microscope, rinse off residual salt with distilled water. Then, wick away the remaining water and finally, wipe the lens clean with lens tissue.
How to clean immersion lenses
To clean oil immersion lenses of your microscope, wipe off oil with a lens tissue. If oil has already built up, use a lens tissue soaked in the correct solvent for the oil being used. Ask your oil or lens supplier which solvent to use. Gloves should be worn during this process, as immersion oils are often irritants and in some cases are toxic. After cleaning the oil immersion lenses of your microscope, the lenses should be completely clear of oil and other spots and smears.
Cleaning the eyepiece lenses
To clean the eyepiece lens of your microscope, breathe onto the eyepiece lens and then wipe with lens tissue. For dirt that is difficult to remove, add ethanol (methanol in extreme cases) to a cotton swab, wipe the surface and then dry with a dry swab.
Cleaning the filters
There are two types of interference filters: hard- and soft-coated ones. Hard-coated filters can be cleaned using swabs or lens tissue, whereas soft-coated ones should not. If you have a soft-coated filter that requires cleaning, contact the filter manufacturer.
Always wear gloves when handling filters. This prevents accidental finger prints or other contamination of the filter surface. Finger cots are not sufficient, as luck will always have an uncovered part of the hand leaving a mark on the filter.
Steps for cleaning the hard-coated interference filters
1. Hold the filter by its edge only and avoid touching coatings with hands.
2. Hold the filter and, using a dust blower with gentle to moderate air flow, blow air across the surface of the filter to remove any loose dirt. Blow the air across both sides of the filter.
3. Fold a lens tissue into a triangular shape to create a pointy tip. Add some pure methanol to the tissue (ethanol usually also works, but avoid using acetone due to the fast evaporation and tendency to leave a thin contamination layer). Clean the filter by wiping in a spiral pattern. Repeat this for both sides.
Cleaning the condenser
Only clean the top lens of the condenser. Do not remove any components used for contrast techniques, such as DIC, or polarising elements.
Hold a piece of lens tissue soaked in cleaning solution between your middle and index fingers. Fold it and wrap it around your index finger. Hold the tissue down with your thumb while wiping the lens surface clean.
Alternatively, it can be useful to carefully fold the tissue paper with a pair of forceps, then use it as a swab whilst it is still held by the forceps.
If there is a salt build-up on the outside of the condenser (from leaking perfusion chambers), carefully remove this. If a water-dampened cotton swab isn’t sufficient, contact the manufacturer before taking more radical steps. Ideally, salt build-up should be avoided by thoroughly cleaning up any spillage immediately.
Cleaning slides
Carefully wipe the slide with a cotton swab soaked in methanol. Ensure that your mounting medium/glue isn’t dissolved by the solvent.
Take care not to damage or squash the specimen by applying too much pressure to the coverslip.
Additional tips for cleaning the optics of your microscope
- Before every use, inspect the front lens of the objective for dirt.
- Only clean the optics when dust or dirt can be seen, as each time cleaning takes place, there is a risk of scratching the lenses. Dipping and immersion lenses are exceptions, as these require cleaning after every use.
- If internal or major cleaning becomes necessary, please contact your manufacturer.
- Always clean the optics gently – excessive pressure can damage the lenses.
- It is recommended to check with the manufacturer that cleaning optics will not invalidate warranty.
Things to avoid when cleaning the optics of your microscope
- Using abrasive materials to wipe your lenses, such as tissue paper, dry linen cloths, Kim Wipes or polystyrene sticks.
- Wiping lenses with dry materials, including dry lens tissue, as this will scratch them.
- Cleaning the internal optical surfaces or camera; if unexposed surfaces require cleaning, contact your microscope manufacturer.
- Optical spray cans containing pressurised liquid air, as these leave a small residue which is difficult to remove.
- Using window cleaners and glasses cleaners to clean your microscope lenses.
We hope this article helped you with cleaning the optics of your microscope. If you would like any further advice, please contact our team of experts at [email protected].


)