

Patch clamp electrophysiology analysis with Python

by Vincenzo Mastrolia, Research Associate at Keshavarzi Lab, University of Cambridge, Department of Physiology, Development and Neuroscience
Introduction
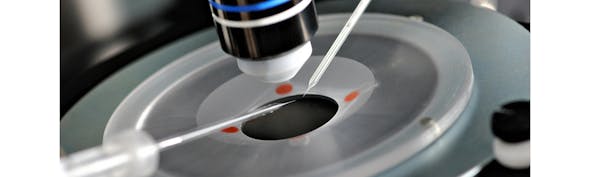
Patch clamp electrophysiology has been used for decades to investigate the functions of excitable cells, from looking at the properties of single channels to tracking the activity of neuronal connections. It allows to collect solid, reproducible, high-resolution electrical data from single cells in a fast and reliable manner. When it comes to data analysis, however, things can get a little more complex. The ability to collect datasets of hundreds of cells, using a variety of different protocols, also means a lot of files to analyse. If you're new to electrophysiology, analysing your data could become more overwhelming than performing the actual experiment. In this article, we briefly describe the two main acquisition systems for patch-clamp electrophysiology, resources to learn how to reliably analyse your recordings, and why using programming languages like Python to analyse your data is the way to go.
Acquisition systems
If you are currently learning patch-clamp or if you have already some years of experience, you likely used one of these two major acquisition systems used in the majority of laboratories across the world: Molecular Devices' pClamp and HEKA's PatchMaster. Both systems are very solid and reliable and offer responsive support.
pClamp
Molecular Devices' pClamp is a software package that offers excellent features and a variety of tools. Within pClamp, Clampex is an easy-to-use acquisition software that has been used to measure specific ionic currents, intrinsic properties of cells and neuronal activity. The second tool within pClamp, the software Clampfit is the core of the analysis and allows you to inspect, select, process and analyse your traces. For more information on this acquisition software and to learn about the principles of patch-clamp, the
Axon Guide is always a must. Molecular Devices also has a very useful YouTube channel, which offers a variety of tutorials on how to analyse your recordings. Remarkably useful and another must if you want to dive into the world of electrophysiology is the blog Spikes and Bursts, which, among other interesting topics, offers a variety of tutorials on how to analyse your recordings using Clampfit.
PatchMaster
HEKA's PatchMaster is a solid and reliable acquisition system, with a less Windows-style graphic user interface that might make you feel like you are manoeuvring an airplane console. Once the initial feeling has passed, however, every PatchMaster user realizes that this is a great software that allows one to perform and control the experiments in detail. It offers unique built-in features, like the possibility of recording cell capacitance changes at high resolution. Besides a very useful online analysis, PatchMaster allows exporting your traces in a variety of formats, including ASCII, IgorPro and MatLab. This means that the user has a lot of control over what to use to analyse the data acquired with PatchMaster. HEKA offers a series of documentation to learn to use the basics of PatchMaster and has also a YouTube channel with tutorials.
Python - Event Finder
Analysing your electrophysiological recordings with programming
Why Python?
MATLAB programming language has been an outstanding analysis tool in the world of electrophysiology and scientific research in general. It enables one to easily analyse electrophysiological recordings, independently from whether the acquisition system was HEKA or Molecular Devices. MATLAB has one only problem (at least for me): it is not for free.
Here is where Python enters the picture. Python is a free, open-source, interpreted and object-oriented language used by a worldwide community, not only scientific. This means that the resources to use, the libraries and discussion forums on Python are infinite. It also means that it is very easy to start using, with an endless list of sites and YouTube channels of beginner tutorials and courses to learn this programming language. New libraries and tools are constantly created by this vast Python community. More importantly, in the last years, Python has been increasingly used in science.
Depending on the level of programming skills and the type of experiment/protocol performed, the user could go entirely custom (writing the analysis script from zero), use packages specific to the scope of the analysis, or a mixture of both. Once again, the amazing blog Spikes and Bursts offer great support, explaining from zero how to use python for analysing action potentials, passive membrane properties or synaptic events.
Now, we will briefly mention the steps needed to analyse patch-clamp electrophysiological recordings using python. We will mention the essential packages and libraries to use and see an example of the results.
1) Extracting your traces in Python
The first step in an analysis script is always to extract the raw data from our recording traces. To do so, it is necessary to install in Python a package able to read the acquisition file and convert it into a new Python-based object. Several can be found online.
However, I suggest the following, depending on whether you use pClamp or PatchMaster. pyABF - The best tool I've found to extract pClamp acquisition files (.abf format) is called pyABF. It is incredibly easy to apply and, more importantly, has great documentation with tutorials that I heartily recommend. pyABF allows the selection of individual sweeps within the file or only a section of the sweep and reports initial parameters such as sweep duration, number of sweeps and acquisition rate.
loadHEKA - Regarding extracting the raw data from PatchMaster, Easy Electrophysiology has recently created a new package in testing phase called loadHEKA. Although I have not personally used it, loadHEKA appears very promising and is inspired by other solid Python packages like heka_reader.
2) Processing your signals in Python
Imagine having extracted a sweep from the original file. The signal has a partially unstable baseline, and it is affected by a canonical Hum (50 Hz) electrical noise.
First, let's stabilise our unstable baseline. We use the Python library NumPy, a highly optimized Python package oriented toward mathematical operations. It handles one- and multidimensional datasets, allowing the application of infinite mathematical functions, and statistical analysis with incredibly high speed of operation, thanks to its C-based code. To achieve a stable baseline, we can calculate the median of the first section and the last section of our sweep and use these two values to create a new line to subtract
from our original signal. These steps use two functions from NumPy called numpy.median and numpy.linspace.
In order to deal with a 50 Hz electrical noise within our signal we will use another built-in library within Python: SciPy. SciPy is an extension library from NumPy, highly focused on scientific applications. A great number of incredibly useful tools have been created within this library, one of which is for example Signal. This package offers a variety of functions aimed at transforming any signal.
As often happens in an electrophysiological rig, we probably already know that our crippling noise is at a frequency of 50 Hz. If we want to remove this noise, we first need to create a filtering kernel specific to 50 Hz and then apply a filtering function using this kernel. Within Signal, two specific functions are really useful to remove noise: signal.iirnotch and signal.filtfilt.
3) Analysing your processed signal in Python
Let's imagine that our experiment was to record spontaneous synaptic events from our patched neuron. We have now a clean and stable signal and we want to find individual synaptic events within our signal.
To do this, another useful tool within Scipy and Signal is signal.find_peaks which allows isolating peaks within a time series and is extremely useful to label synaptic events from patchclamp recordings. It will require a bit of tuning of the initial parameters but signal.find_peaks is an extremely solid and optimized tool that extracts a series of important parameters such as event amplitude, rise time, slope position within the sweep and so on.
4) Organising your event parameters and performing statistics
We've now extracted important parameters from hundreds of synaptic events. Where do we organise them? We need a form of table that allows us to select which parameters to perform statistics and plotting on. Pandas is a great tool for data organization, analysis and extraction into conventional database formats, like Windows Excel. Within a Pandas DataFrame, the main Pandas object, it is possible to select individual parameters or combinations thereof within a dataset, to perform the most various statistical analyses.
We can use pandas to insert each synaptic event and organise its parameters within the dataframe columns. Within Pandas, we can quickly perform simple statistics by selecting which parameters/columns we want to look at.
5) Plotting events and statistical summary
We now have extracted our events and their parameters, but we want to be able to visualise these events and plot the statisticsof the parameters. Matplotlib is, as the name might suggest, a data plotting library. It is easy and quick to use and allows one to plot the most vibrant and fascinating graphs. An evolving series of extension libraries based on Matplotlib is constantly updating and creating graphs in any format and flavour. We can organize our figure in subplots and visually inspect every single event in one subplot and find its position within the entire sweep in another subplot.
Using pyABF and the four essential libraries we mentioned above, I was able to create a small tool for the analyses of spontaneous synaptic events. I used SciPy to isolate specific noise frequencies in my recordings and filtered them out. I used SciPy and NumPy to correct the baseline, find individual events, extract parameters like rise times, amplitudes and duration, to fit the rise and decay phases and store all those values in a Pandas DataFrame. Using Matplotlib, I plotted each event and showed its location within its sweep (see animation).
Summary
In summary, Python is becoming increasingly useful for scientists who yearn for an open-source, transparent and sharing scientificcommunity. It allows to I hope that after reading this article you will start using this amazing platform to analyse your patch clamp recordings.


)